Starting out with the ASP.NET Core React template (part 2 - Web API)
So now we know our way round the front end part of a new React + Web API project, what about the Web API part?
Everything else in the new project (apart from the ClientApp folder) is there to make your Web API work.
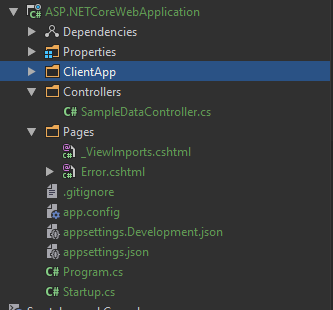
First up we have the Controllers folder.
API controllers for your data#
In the controllers folder you’ll find an example controller which returns some hard-coded data for your application.
[Route("api/[controller]")]public class SampleDataController : Controller{    // other code omitted
    [HttpGet("[action]")]    public IEnumerable<WeatherForecast> WeatherForecasts()    {        var rng = new Random();        return Enumerable.Range(1, 5).Select(index => new WeatherForecast        {            DateFormatted = DateTime.Now.AddDays(index).ToString("d"),            TemperatureC = rng.Next(-20, 55),            Summary = Summaries[rng.Next(Summaries.Length)]        });    }
    // other code omitted}
At the top we have a Route attribute which means any requests to our application /api/SampleData will be routed here.
The WeatherForecasts method has its own HttpGet("[action]") attribute.
This tells ASP.NET Core’s routing engine to take any requests to /api/sampledata/WeatherForecasts and forward them to this method (our controller action).
The rest of the code in this method (and more code in the controller which I’ve omitted for brevity) simply generates some random “weather” data and returns it as an IEnumerable of WeatherForecast.
The shape of the returned data is defined by the WeatherForecast type which looks like this…
public class WeatherForecast{    public string DateFormatted { get; set; }    public int TemperatureC { get; set; }    public string Summary { get; set; }
    public int TemperatureF    {        get { return 32 + (int) (TemperatureC / 0.5556); }    }}
Testing your work#
To test a simple GET like this you can launch your application and click through the various screens in your front end app, or you can take a more direct approach and make HTTP requests direct to your API.
Start by launching your application.
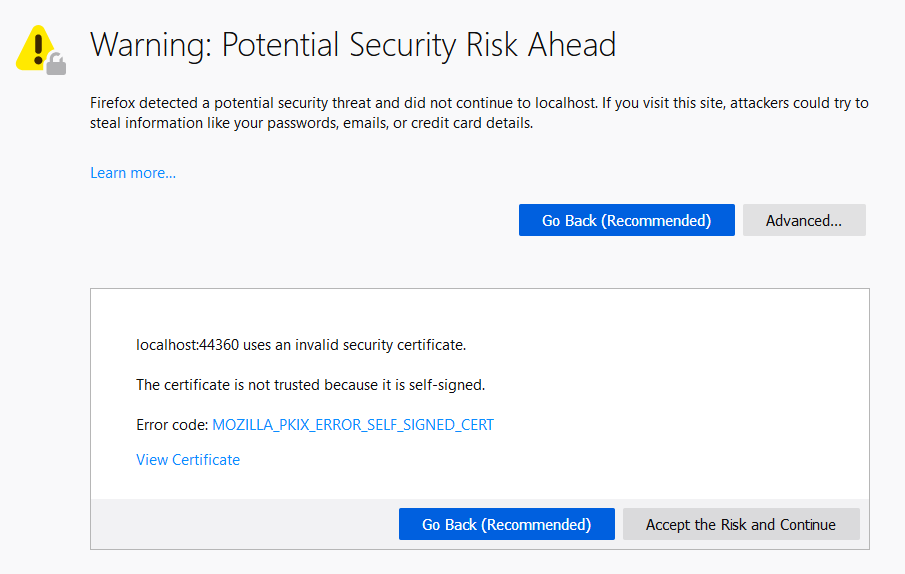
If this is the first time you’ve launched you may run into a warning message about a “Potential Security Risk Ahead”; this is because ASP.NET is attempting to run using HTTPS but uses a special “self-signed” development certificate to make it work.
You wouldn’t want to use that certificate for deployment to production but it’s fine to accept this certificate and continue on your local machine. Here’s what the warning looks like in Firefox.
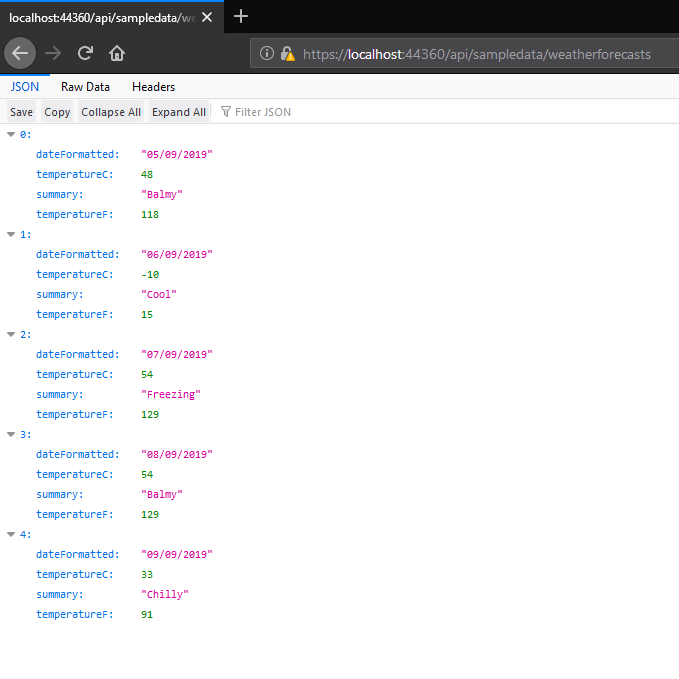
Once it’s up and runnning, you can test that GET action by simply entering the URL in the browser…
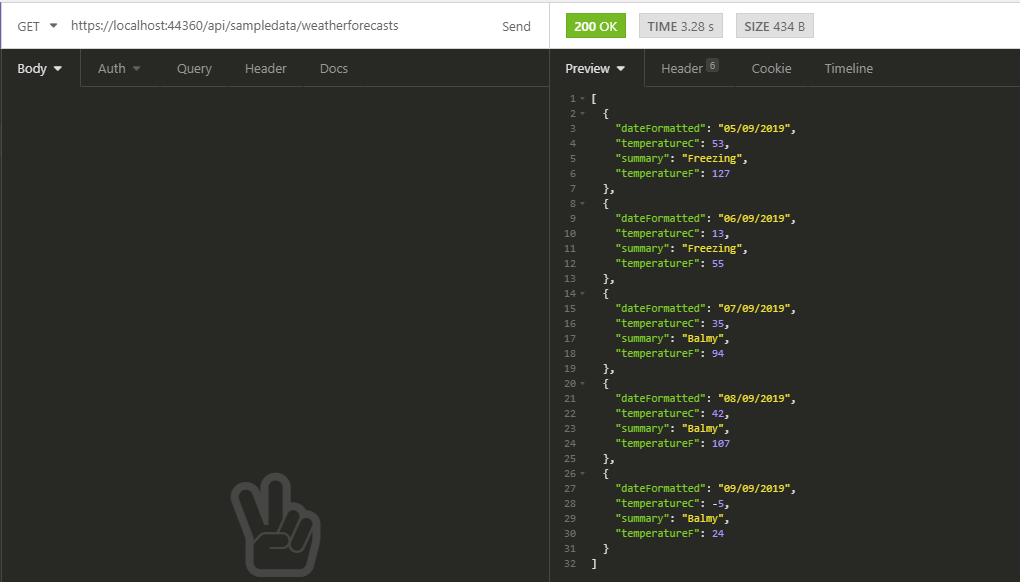
Alternatively you can use other tools to test your API.
Postman and Insomnia are the two major contenders for this job, with my personal favourite being Insomnia.
To test your API using Insomnia you need to download and install it, then take note of the address your application is running on, and enter it into the URL box at the top of the screen.
Ensure the request type is GET, hit Send and you should see your lovely random weather data returned.
Startup.cs#
The other file of note in the backend part of the project is startup.cs.
In ASP.NET Core this is where you’ll find yourself configuring your application.
Take a look and you’ll see various calls to tell ASP.NET how it should operate.
For example, the following code tells ASP.NET Core to show a “developer friendly” error message if we’re running in development mode (on a development machine)…
if (env.IsDevelopment()){ app.UseDeveloperExceptionPage();}Most of this file is bog standard ASP.NET Core but there are a few React/SPA specific calls.
Most notably you’ll see a call to UseSpaStaticFiles.
When you run your application in production your React code will be compiled and minified into static .html and .js files in ClientApp/build.
UseSpaStaticFiles and the corresponding call to AddSpaStaticFiles ensure these compiled and minified files will be served to the browser when a user visits your application.
UseSpa similarly ensures that the default starting page for your React application is served up when requests are made to the application.
This code…
if (env.IsDevelopment()){ spa.UseReactDevelopmentServer(npmScript: "start");}… makes sure that your React application is served using the React Development server when running in Development mode (on your machine).
This gives you more detailed output in the console of the browser and also handles things like auto-refreshing the browser when you make changes to your application.
Launch and/or publish your application#
It’s worth knowing what’s going on when you launch or publish your application.
If you take a gander at your application’s .csproj file you’ll notice some calls to npm.
 <Target Name="PublishRunWebpack" AfterTargets="ComputeFilesToPublish">        <!-- As part of publishing, ensure the JS resources are freshly built in production mode -->        <Exec WorkingDirectory="$(SpaRoot)" Command="npm install"/>        <Exec WorkingDirectory="$(SpaRoot)" Command="npm run build"/>
        <!-- rest of code omitted for brevity --></Target>
When you publish your application these npm calls ensure any front-end dependencies are downloaded and that your application is built (compiled and minified) ready to be served in production.
To run your project locally you can just hit CTRL+F5 (in VS) and both parts of the application (front-end and back-end) will be launched together, running at the same web address.
You can control which port is used by modifying the launchSettings.json file in the Properties folder.
So in this example, if you launched this application using IIS Express it would run on port 40512 (http) or 44360 (https).
"iisSettings": { "windowsAuthentication": false, "anonymousAuthentication": true, "iisExpress": { "applicationUrl": "http://localhost:40512", "sslPort": 44360 } },Launching the React application on its own URL#
One downside to running both the React and ASP.NET Core parts of your application together is that any changes to your C# code will trigger a recompile and restart of your application, rendering your React front-end unresponsive for a few seconds.
The ASP.NET Core build will also take longer because it also has to rebuild the React part of the application, even if you haven’t changed it.
To work around this you can choose to launch the React part of the application separately, on its own port.
To do so, add a .env file to the ClientApp directory and add this setting:
BROWSER=noneNow you’ll need to launch the React application manually (it won’t launch when you launch the .net application):
cd ClientAppnpm startBy default your React app will launch on port 3000.
Now you need to alert ASP.NET Core to this fact by making a small change to startup.cs.
Replace spa.UseReactDevelopmentServer with this code:
spa.UseProxyToSpaDevelopmentServer("http://localhost:3000");Now when you build and launch your ASP.NET Core app it won’t launch its own React server or restart the one you’ve manually started.
You’ll find your application running at http://localhost:3000 whilst your ASP.NET Core API continues to run on the port specified in launchSettings.json.
There are a few gotchas to watch out for if you go down this route: specifically you might find your network requests to the API start failing; my next post will explain why (and how to fix it).