Starting out with the ASP.NET Core React template
Agghhh, what’s with all those files when you spin up a new ASP.NET Core and React.js project?!
The “out of the box” experience if you’re new to either React or ASP.NET Core (or both) can be pretty overwhelming; it’s hard to know where to start.
So let’s break it down and see what we’ve got.
First up it’s fairly straightforward to spin up a new project which gives you both React and ASP.NET Core …
Using the dotnet CLI…
dotnet new reactOr Visual Studio/Rider etc.
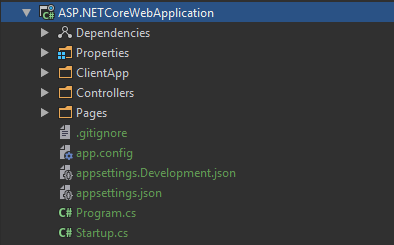
Either way you’ll end up with something which looks like this…

Now at first glance there may seem to be a lot going on here (especially when you start drilling into the various folders) so let’s break it down.
The project is best considered as two entirely separate entities which happen to be co-located in the same place.
- A React application (using “Create React app”)
- An ASP.NET Core Web API backend
React front end#
ClientApp houses the frontend part of your new application.
So long as you’re using version 2.1 or higher of the .NET SDK you’ll find this part of the application is a standard React application created using something called “Create React App”.
The only real difference between this and a CRA app is that the .NET team have also provided some example React components to help get you started.
When you run the application ClientApp/public/index.html will be served to your browser.
In there you’ll see a div which looks like this…
<div id="root"></div>This element is all important as React will render your application into this div.
Take a look at ClientApp/src and you’ll see some .js files and a components folder.
In index.js you’ll see the very “top” of your application; this is where it all starts.
import 'bootstrap/dist/css/bootstrap.css';import React from 'react';import ReactDOM from 'react-dom';import { BrowserRouter } from 'react-router-dom';import App from './App';import registerServiceWorker from './registerServiceWorker';
const baseUrl = document.getElementsByTagName('base')[0].getAttribute('href');const rootElement = document.getElementById('root');
ReactDOM.render(  <BrowserRouter basename={baseUrl}>    <App />  </BrowserRouter>,  rootElement);
registerServiceWorker();
The first few lines bring in various modules from other js files and node modules you need to run the app.
Then a variable is declared which points to that div we noticed earlier in index.html (with id root).
ReactDOM is called to render your application which consists of a BrowserRouter and App components into this root div.
Legacy .NET web apps causing you grief?
Build modern, reliable web applications, faster with .NET and Blazor.
Build better .NET web appsSo far so good.
Now if you head into the <App /> component you’ll see yet more of that funny looking “almost HTML” which points to yet more components…
export default class App extends Component {  static displayName = App.name;
  render () {    return (      <Layout>        <Route exact path='/' component={Home} />        <Route path='/counter' component={Counter} />        <Route path='/fetch-data' component={FetchData} />      </Layout>    );  }}
That “almost HTML” is actually “JSX”. It may look like HTML but is actually converted into javascript which React then uses to interact with the DOM in your browser.
This React component (App) nests a few Route components inside a Layout component.
Already we’re beginning to see how React apps are built as lots of small components which can be composed together.
In this case, Layout takes care of rendering things like a NavBar for the application then these Route components let you assign paths to specific components.
So when you run the app in a browser and head over to /fetch-data the FetchData component will be rendered but if you head to /Counter then FetchData will be omitted from the DOM and you’ll get the Counter component being shown instead.
Because the Layout component is rendered by itself (not using a Route component) it will remain visible all the time (irrespective of the path you navigate to).
Next Steps#
The best way to figure out how the template works is to explore further and try to break some things!
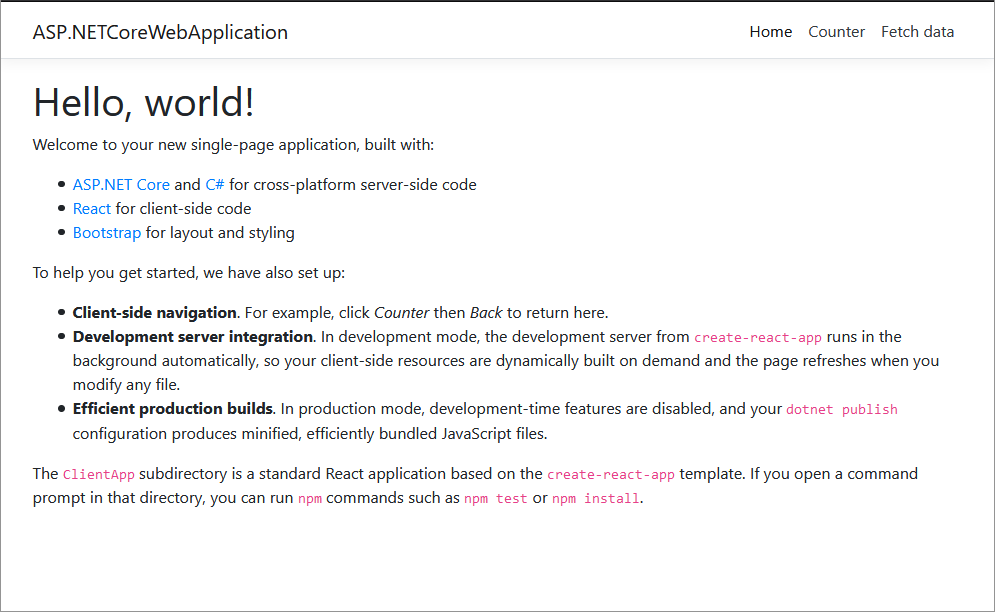
When you run the application (from VS or the CLI) you’ll find the React app launches in your browser.

As you click on the links in the NavBar you’ll see how the general Layout (including NavBar) remain the same but the rest of the page updates to show the relevant component(s).
From here on, any changes you make to the front end part of your application will trigger an update in your browser, so you can quickly change/tweak and generally fiddle with stuff and immediately see the results of your efforts!
Next time we’ll take a quick tour of the Web API part of the project.