Powered by MediatR#
Remember when we discussed how Blazor is a UI framework and that your business logic goes elsewhere?
Well the time has come to focus on that business logic.
For this we’ll actually use the same project we’re already in (“MyTweets” in my case) but there’s absolutely no reason the code we’re about to write couldn’t be moved into its own project and then shared between different UI projects (or exposed via Web API etc.)
The requirement#
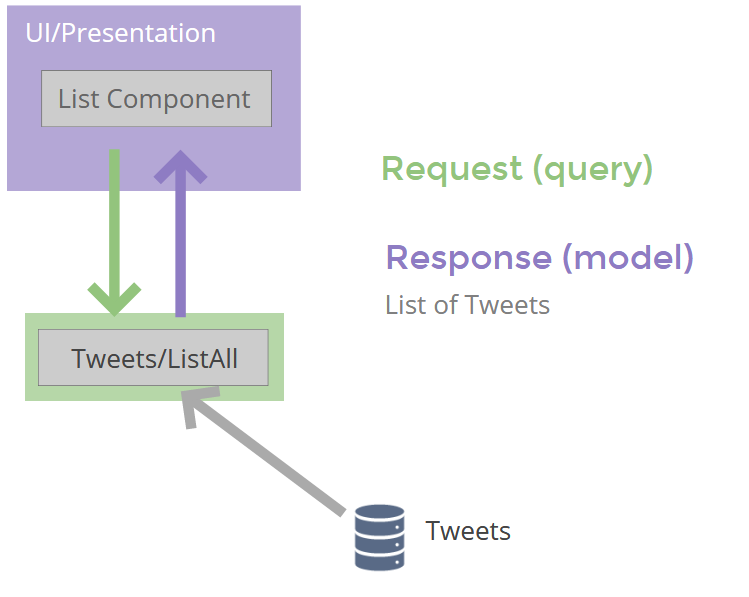
So we need to return a list of tweets when the UI asks for it.
The UI will make a request (“please give me a list of tweets”) and our application will respond accordingly.
This basic Request/Response pattern is repeated in virtually all web applications and enables you to:
a) Retrieve data (query) e.g. retrieve a list of tweets
b) Tell your application to do something (command) e.g. post a new tweet

We need a way to represent this Request/Response pattern in our application and, if we get this right, we can re-use the same application logic whether we opt for Blazor, React or even WPF/WinForms for our UI!
Retrieve a list of tweets using MediatR#
There are several ways we can go about implementing this application logic and my preferred one is to use a small library by Jimmy Bogard, called MediatR.
{{% info-panel %}} What we’re aiming to do here is build the “business logic” part of our requirement.
We’ve built the UI already, the component(s) which show a list of tweets, now we turn our attention to the “business logic” for the feature.
The code we’re about to write is the code that handles things like connecting to a database, runing logic to filter the results we get back etc. before returning the data for our frontend to consume. {{% /info-panel %}}
Start by adding this NuGet package to your application.
Either in Visual Studio via the Package Manager console:
Install-Package MediatR.Extensions.Microsoft.DependencyInjectionOr via a terminal/command line:
dotnet add package MediatR.Extensions.Microsoft.DependencyInjectionEither way, this will install both MediatR and another package for integrating MediatR with the built-in Microsoft Dependency Injection framework.
Now we need a way to represent our Request and Response in code.
Here’s how I’d do it.
Add a new Features Directory to your project.
In there create a new directory called Tweets.
Now create a List.cs class in our new Tweets folder.
This is where we’re going to represent our Request (query) and Response (model). We’ll start by replacing the contents of List.cs with the following:
using MediatR;using System.Collections.Generic;using System.Threading;using System.Threading.Tasks;

namespace MyTweets.Features.Tweets{    public class List    {        public class Query : IRequest<Model>        {        }
        public class Model        {            public List<string> Tweets { get; set; }        }    }}
Our Query class has no properties because we’re not yet thinking about things like search (in which case we’d need to include a property for SearchTerm here).
The Model class represents the shape of the data we want to return (in this case, a list of strings which represents our tweets).
Now all we need is a way to handle this request and return our model.
Add a QueryHandler class to the end of your List class (directly below Model).
{    // existing Model class  public class Model  {      public List<string> Tweets { get; set; }  }
  // add this nested class...    public class QueryHandler : IRequestHandler<Query, Model>    {        public async Task<Model> Handle(Query request, CancellationToken cancellationToken)        {            return new Model            {                Tweets = new List<string>                {                    "One from the server",                    "Two from the server",                    "Three from the server",                    "Four"                }            };        }    }}
That’s all we need (for now). A simple hardcoded list of tweets, but this time served by our application, rather than directly in the Razor component.
Hooking it all up#
There’s just a couple more things to do if we’re going to invoke this request from our component.
First we need to tell our application we’re using MediatR (so it can find and wire up all our handlers, like the one we just created above).
Head over to Startup.cs and add this anywhere in ConfigureServices:
Startup.cs
services.AddMediatR(Assembly.GetExecutingAssembly());You’ll also need two new using statements:
using MediatR;using System.Reflection;Now head over to the List.razor component.
Remember this code?
protected override async Task OnInitializedAsync(){ _tweets = new List<string> { "One tweet", "Two tweets", "Three tweets", "Four" };}We’re going to make our MediatR call here.
At the top of List.razor add these two lines.
@using MediatR@inject IMediator MediatorThis tells our component to inject an instance of IMediator and alias it as Mediator.
Now we can call Mediator in our code.
Change the @code block in List.razor as follows:
@code {    private List<string> _tweets;
    protected override async Task OnInitializedAsync()    {        var model = await Mediator.Send(new Features.Tweets.List.Query());        _tweets = model.Tweets;    }}
We’re sending our List.Query request via MediatR, then taking the response and directly assigning the list of Tweets to our _tweets private field.
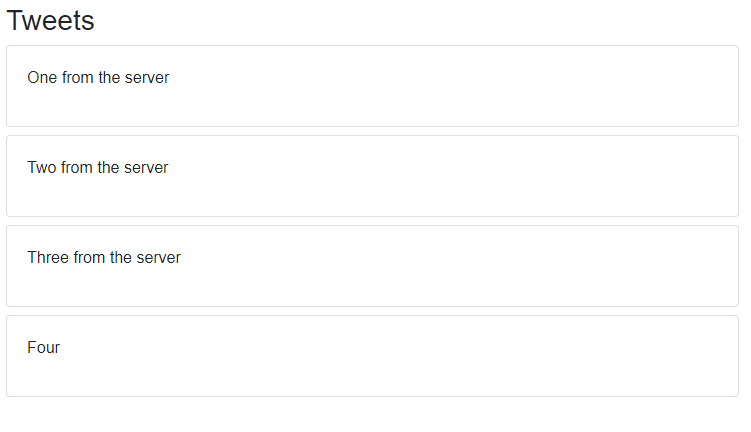
Run your application now, MediatR will kick in and you should see some tweets from the server!

Nice!
It’s worth taking a moment to reflect on where we’re up to.
We now have a clean architecture which enables us to build our application’s logic (queries and commands) in a way which doesn’t box us in to any specific UI framework.
Imagine a requirement came in to rewrite part of the UI using React.
You could add an API controller and serve this same list of tweets, ready for consumption by a React.js frontend…
[Route("api/[controller]")][ApiController]public class TweetController : ControllerBase{    private readonly IMediator mediator;
    public TweetController(IMediator mediator)    {        this.mediator = mediator;    }
    [HttpGet]    public async Task<IActionResult> List()    {        var model = await mediator.Send(new List.Query());        return Ok(model);    }}
The query (request and response) stays the same but now you can invoke them via an HTTP call to your API.
Pretty neat huh?
Next (and finally) let’s look at introducing a lightweight data store for testing so we can make our application handle new tweets.