A Simple Tweet UI#
OK, let’s start with the user interface for MyTweets.
We could do this the other way round (model the backend first) but there’s something quite pleasing about seeing the interface materialise before your eyes so we’ll start there, then think about modelling the backend once we have a better idea what we’re aiming for.
A list of tweets#
First up, we want a really simple list of tweets.
In this case a tweet is going to be simply the tweet contents for starters.
If you look at your new Blazor Server project you’ll notice a folder called Pages.
Add a new directory to this called Tweets.
Add a new Razor Component to this Tweets folder (in Visual Studio you can click Add Item, or just create a file with a .razor extension).
Call this new component List.razor.
Then make sure you have this markup…
<h3>List</h3>
@code {
}
That’s it; your first component!
Now we want to show a list of tweets and given the Blazor project template includes Bootstrap CSS we can make this look half decent simply by referencing a few CSS classes.
Replace the contents of List.razor with the following markup…
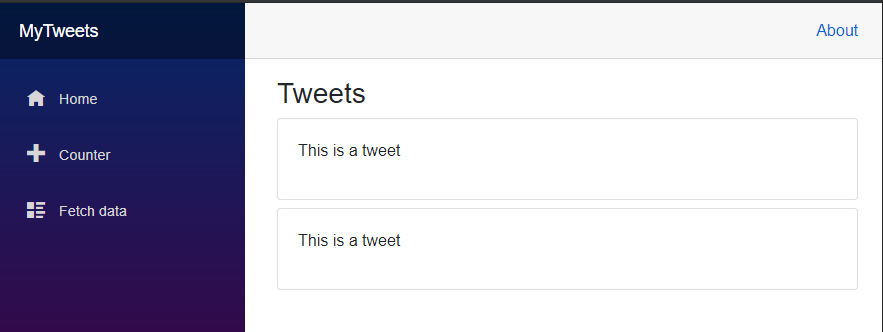
@page "/tweets"
<h3>Tweets</h3>
<div class="card mb-2">    <p class="card-body">        This is a tweet    </p></div><div class="card mb-2">    <p class="card-body">        This is a tweet    </p></div>
@code {
}
We have some duplication but essentially this is the UI we’re aiming for; a list of tweets using Bootstrap’s card styles to render the contents of a tweet.
Run your application, navigate to ‘/tweets’ in the browser and you should see this…
Blazor is all about components.
In fact this list page is really just a component. The @page directive at the top means we can navigate to it by going directly to /tweets in the browser.
But we could just as easily include this component on any page in our application.
Try it now; head over to Index.razor and modify the markup to include a reference to our tweets list component.
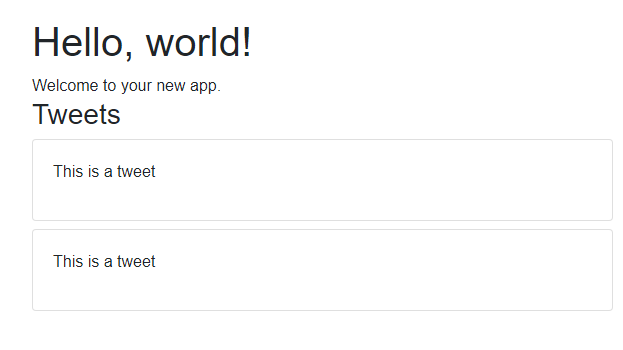
@page "/"
<h1>Hello, world!</h1>
Welcome to your new app.
<MyTweets.Pages.Tweets.List />
Try running this and navigating to your application’s root URL in the browser…
Nice! We have successfully mangled our homepage and crowbarred in a list of tweets!
Who said UI design was hard ;-)
This works, but that name for our component looks a little, verbose…
We can shorten the component reference by employing a @using statement at the top of our component.
@page "/"@using MyTweets.Pages.Tweets
<h1>Hello, world!</h1>
Welcome to your new app.
<List />
Much better. Now we can simply reference <List /> because we’ve told Blazor to look in the MyTweets.Pages.Tweets namespace for any Razor Components we might want to use.
Remove duplication#
We’ve currently got a little duplication in our UI, where we have two hardcoded tweets.
When you see repeated markup like this it’s usually a good indicator that you can create another component.
Cut this html from List.razor…
<div class="card mb-2"> <p class="card-body"> This is a tweet </p></div>Create a new Razor Component and call it Tweet.razor, then paste in the markup you just cut. You should end up with this in Tweet.razor:
<div class="card mb-2">    <p class="card-body">        This is a tweet    </p></div>
@code {
}
Now back in List.razor we can reference this Tweet component…
@page "/tweets"
<h3>Tweets</h3>
<Tweet /><Tweet />
@code {
}
Nice, we have two tweets.
But I’m guessing we don’t want to keep modifying this markup every time we want to post a new tweet! Let’s make this a little more dynamic.
Drive tweets from data#
What we really want is a way to loop over a collection of tweets and render our Tweet component for each one.
Replace the existing @code block in List.razor with this one:
@code {    private List<string> _tweets;
    protected override async Task OnInitializedAsync()    {        _tweets = new List<string>        {            "One tweet",            "Two tweets",            "Three tweets",            "Four"        };    }}
Now you have a private list of strings (which represents tweets for us right now). Blazor exposes an OnInitializedAsync method which you can override to do things like retrieving data when your component is rendered.
In there we’ve hardcoded a list of “tweets” (strings).
Now update the markup part of List.razor as follows.
@page "/tweets"
<h3>Tweets</h3>
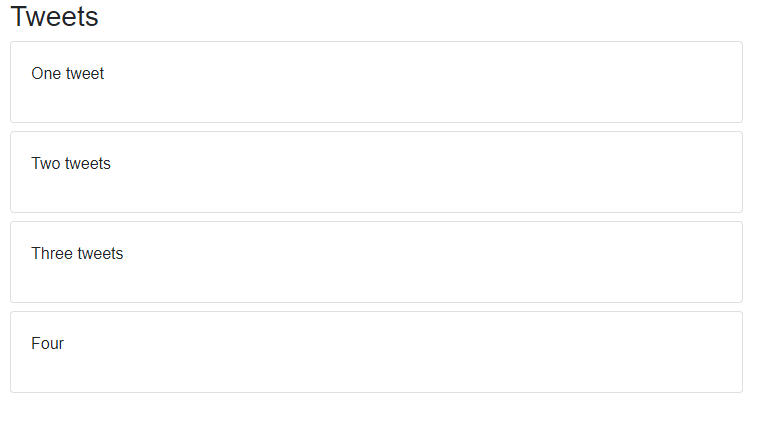
@foreach (var tweet in _tweets){ <Tweet Text="@tweet"/>}Here we’re looping through each string in our _tweets list and rendering our Tweet component for each one. Note how we’re also passing the string into our component using a property called text.
Notice a problem here? What do you expect if you run this in the browser?
Give it a go and you’ll see a big nasty error.
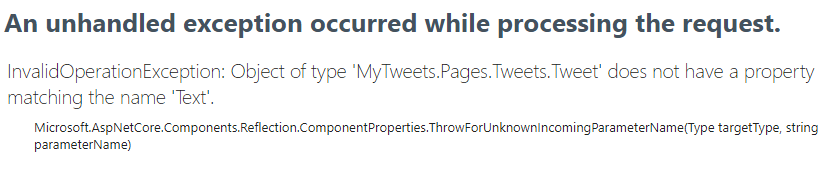
ASP.NET speaks the truth. Our Tweet component doesn’t expose a Text property so this isn’t going to get us very far.
Happily this is easily fixed.
Head over to Tweet.razor and replace the contents with this:
<div class="card mb-2">    <p class="card-body">        @Text    </p></div>
@code {    [Parameter]    public string Text { get; set; }}
We’ve indicated that our component can accept a Text parameter, which we then render in the markup using @Text.
Run your app and you should see this:
Happy Days.
Now let’s figure out how to serve this UI with real data coming from an ASP.NET Core backend.