The basics of publishing your .NET Core web app
So far we’ve looked at:
- Your first .NET Core web application using nothing but the command line
- How to add MVC
- Compile your changes on the fly using .NET Watch.
So how can we get our shiny new app out there for the world to see?
Publishing your ASP.NET Core application#
There are lots of options for hosting your .NET Core application, especially now you can choose linux and take advantage of potentially cheaper hosting.
Whatever you choose, a useful first step is figuring out how to package up your app so you can publish it to your chosen host.
Start with this command.
dotnet publish --output "c:\temp\CoreAppWeb"

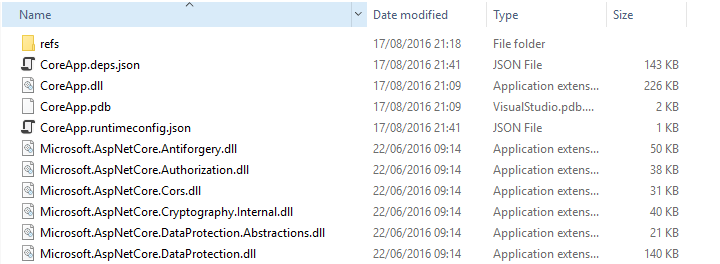
Take a look in that folder and you’ll find a portable version of your project which can be hosted in any number of places (including on Linux or via IIS on Windows).
When you publish your application as a Portable app you’ll need to install .NET core on your target machine (this can be Windows, Linux, Mac or via Docker).
It is also possible to deploy your application as a self contained app which an be published and run on any machine even if it doesn’t have the .NET Core runtime installed. This requires a slightly different approach which we’ll look at in a subsequent post.
Missing Views#
Have another look and you may notice a glaring omission. Depending on how you created your project, you might find that your views are absent from the published output.

This is because we haven’t indicated that content in the Views folder should be copied to the published output.
You can manually fix this by adding the following to .csproj.
<ItemGroup> <Content Include="Views\**\*" CopyToPublishDirectory="PreserveNewest" /> </ItemGroup>If you take this approach, you’ll need to include anything that is needed for your web site to run in production. This includes things like config files (e.g. web.config).
You can include or exclude folders or file extensions. Here’s another example (if we had a web.config file).
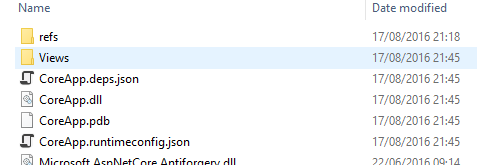
<ItemGroup> <Content Include="Views\**\*" CopyToPublishDirectory="PreserveNewest" /> <Content Include="web.config" CopyToPublishDirectory="Always" /> </ItemGroup>With the views explicitly included, you’ll now find you have a views folder in your published output.

One setting to rule them all#
Before you get too carried away tweaking these options, you can save yourself some effort.
You can make one change that will bring in the most common web app options for you.
Right at the top of your .csproj is an SDK setting.
Ours is set to <Project Sdk="Microsoft.NET.Sdk">.
Change that to <Project Sdk="Microsoft.NET.Sdk.Web"> and you’ll find that you don’t need to explicitly include your views folder after all.
To infinity and beyond#
A word of caution.
Take care if you choose to manually configure which files get included in your publish output.
If you simply run this command…
dotnet publish
your project will be published to the default location which is inside your application’s bin folder.
<yourApplication>\bin\Debug\netcoreapp1.0\publish
All good, until you choose to use wildcards to include all cshtml files (**.cshtml). The dotnet command will look for all cshtml files in your application folder which will include the ones in your bin folder, then include these in the published output.
Do this a few times and you’ll end up with a massive nested folder structure and run into problems.

To avoid this, you’ll either have to be more specific with your wildcards, explicitly exclude the bin folder, or avoid the problem altogether by specifying an output path somewhere outside of your application folder.
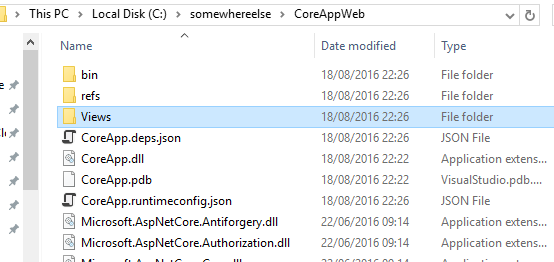
dotnet publish --output "c:\somewhereelse\CoreAppWeb"
Debug vs Release#
If you’re looking to publish your site to a production host you’ll want to package it up in release mode.
By default, publish produces debug output, this is fine if you need to debug your code but is not optimised and will perform slower than if you publish in release mode.
dotnet publish --output "c:\somewhereelse\CoreAppWeb" --configuration release
Testing the output#
Let’s say you want to test that your published output actually works.
In a command prompt, CD to your published output, then run your application.
cd c:\somewhereelse\CoreAppWebdotnet Coreapp.dllNote that you don’t need to call dotnet run just dotnet followed by the name of your compiled dll.

If all has worked correctly, you’ll see the usual message indicating that your app is up and available at the default address.

What next?#
So now you’ve got your nicely published web application, what can you do with it?
If you’re going to host your application using IIS, Rick Strahl’s excellent guide on running Core applications with IIS is well worth a read.
Alternatively you might want to look at deploying your app on linux using docker.
All posts in ASP.NET Core from scratch using the command line
- Your first .NET Core web application using just the command line (in ten minutes or less)
- Add Web API to your .NET Core application
- How to add MVC to your ASP.NET Core web application
- Compile your changes on the fly with .NET Core Watch
- The basics of publishing your .NET Core web app
- How to serve static files for your Single Page Application from .NET Core
- Troubleshoot your ASP.NET Core web app using logging
- How to log different levels of information in your ASP.NET Core app
- Start using Dependency Injection with ASP.NET Core
Struggling to figure out what to focus on with Blazor?
BlazorSharp - The .NET Web Developers community is here to help!
- Connect with your fellow .NET web developers
- Keep up to date with the latest .NET changes
- Exchange tips, tools and tactics