Beyond chat - a quick way to bring AI to your Blazor Web App
When you think of AI you probably think of ChatGPT, Claude, sites where you enter text into a chat box and the AI responds.
But what about your own .NET web applications?
Does it make sense to incorporate chat into your app?
In a lot of cases, the answer is no. Chat as an interface is fundamentally limiting for some uses.
But it can still be useful to use AI as an “engine” your app.
For example, to take unstructured data (like an email reply where someone gives you their address) and turn it into structured data (parse the address).
Or for sentiment analysis, to determine if the person writing the email was mad, really mad, or apoplectic!
So then the question becomes, how to integrate AI with your Blazor application, without spending hours figuring out SDKs and integration instructions for the various available LLMS?
You can also watch this example unfold here:
Use Microsoft.Extensions.AI#
Microsoft.Extensions.AI brings a common interface you can use to interact with any of the LLMs.
Which solves half the problem…
But it can get pretty expensive pretty quick, when you’re developing against an LLM and have to pay per usage as you go.
To solve that problem GitHub Models provides access to most of the major LLMs for free during development.
To make this all work, first you’ll need to install the relevant NuGet package:
dotnet add package Microsoft.Extensions.AI.AzureAIInferenceIt’s a tad confusing that this references Azure, but in this case this is the package we’ll use to interact with GitHub Models.
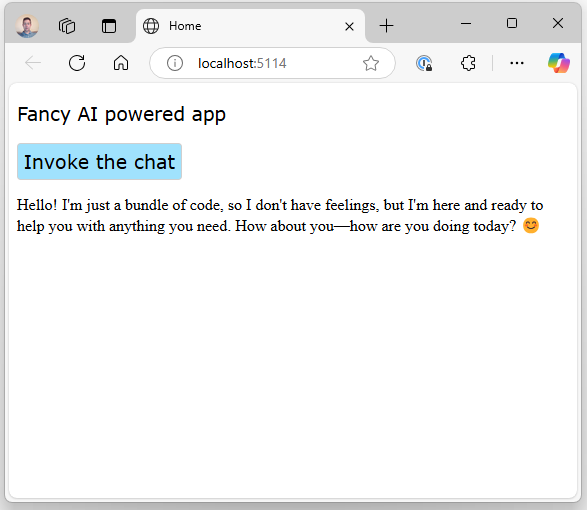
For our simple demo component we can wire up a button to the method that will invoke the LLM.
@page "/"@using Azure@using Azure.AI.Inference@using Microsoft.Extensions.AI
@rendermode InteractiveServer@inject IConfiguration Config
<h3>Fancy AI powered app</h3>
<button @onclick="InvokeLLM">    Invoke the chat</button>
<p>@_response</p>
The button will invoke the InvokeLLM method, and render the resulting _response.
@code {
    private string _response = "";
    private async Task InvokeLLM()    {        var azureKeyCredential = new AzureKeyCredential(            Config.GetValue<string>("GH_TOKEN")        );
        var client = new ChatCompletionsClient(            new Uri("https://models.inference.ai.azure.com"),            azureKeyCredential        ).AsChatClient();
        var response = await client.GetResponseAsync("Hello, how are you today?");
        _response = response.Message.Text ?? "No response";    }}
For this to actually work we need to fix a couple of things.
First, we need to provide that GitHub token (get it, and set its value in config).
Generate a token#
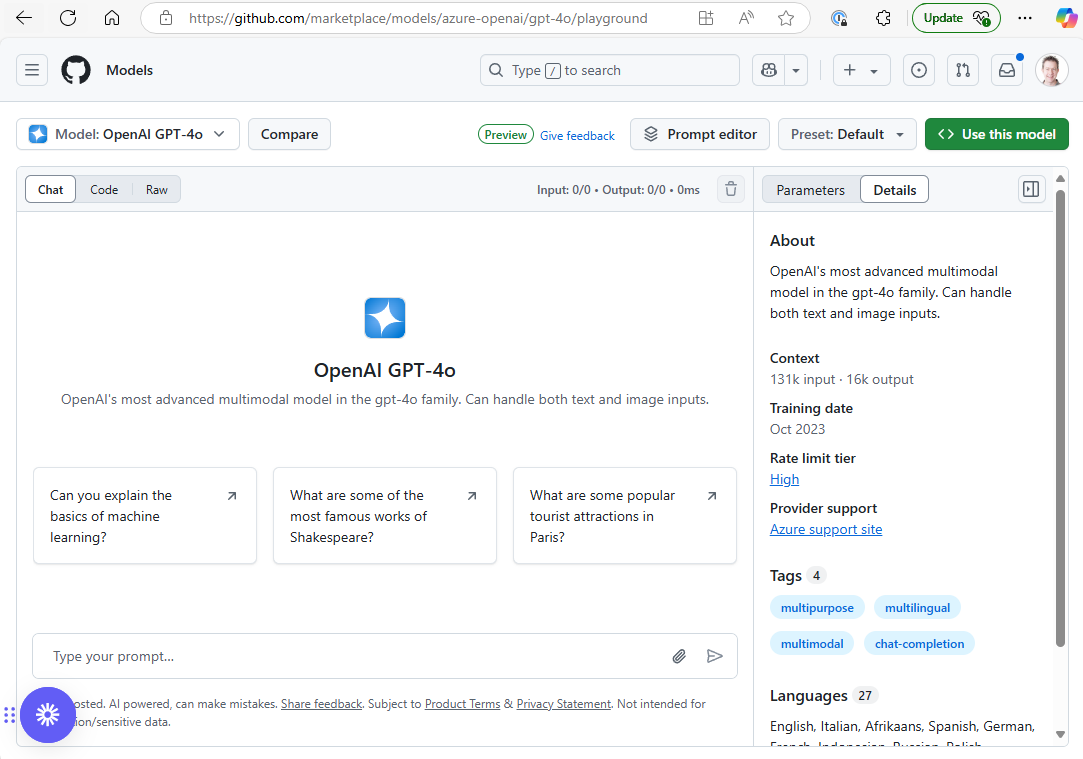
One way to get that token is to head to the GitHub Models page on the marketplace.
Select a model from the “Select a Model” dropdown (top-left). That will bring up this screen.

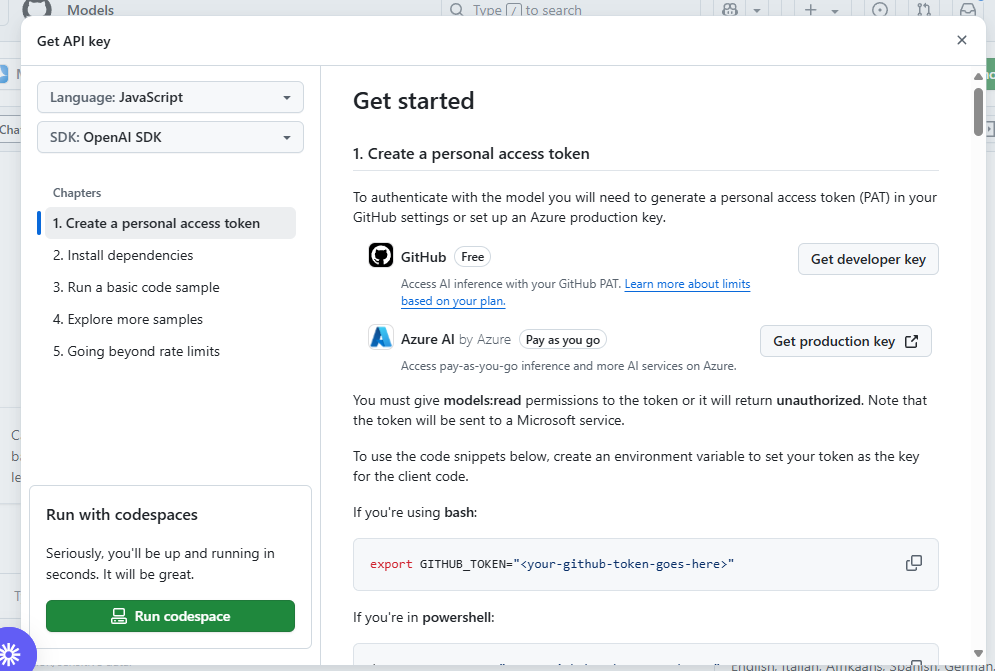
Now you can click the big green “Use this Model” button which pops up a modal like the following…

From here you can go ahead and click “Get developer key”.
You’ll land on the Personal access tokens (classic) page, click “Generate new token”.
You don’t need to enable any specific permissions for this token so scroll all the way down and click the button create the token.
Make sure to then copy the token to your clipboard, as once you leave the page it won’t be shown again.
Now you can paste that code as the value for a setting in your app settings, for “GH_TOKEN”.
Tell the chat client which model to use#
If you run this example now you’ll likely see this error:
Unhandled exception rendering component: No model id was provided when either constructing the client or in the chat options.The problem is we haven’t told our code which model we want to use.
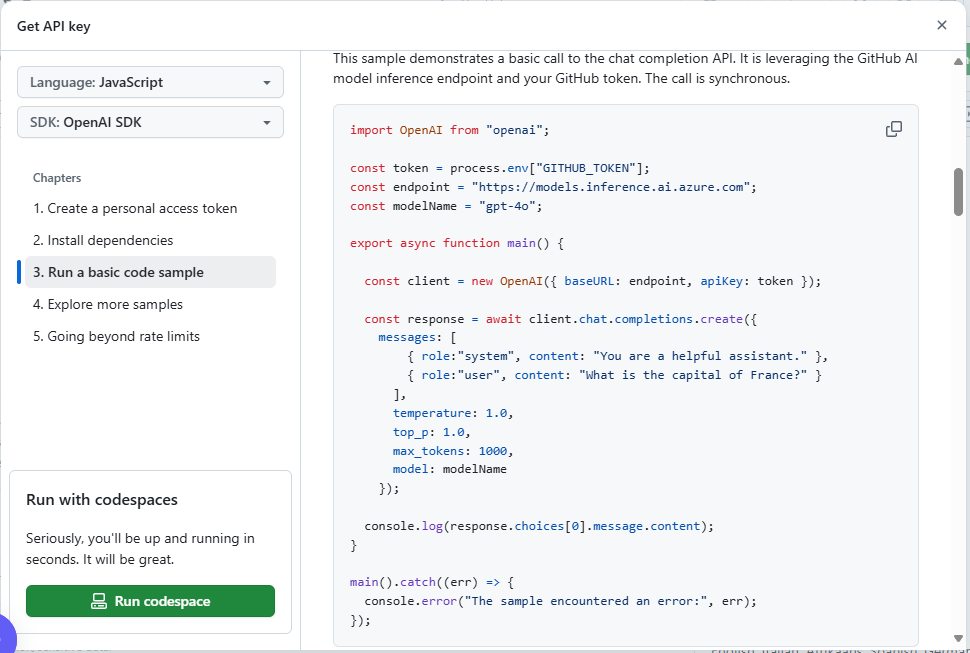
For that we can head back to this screen we saw over in GitHub Models.

Scroll down and you’ll see the model name in the example code.

In this case it’s gpt-4o.
Now we can update our code to specify that model when we call AsChatClient("gpt-4o").
private async Task InvokeLLM(){    var azureKeyCredential = new AzureKeyCredential(Config.GetValue<string>("GH_TOKEN"));
    var client = new ChatCompletionsClient(        new Uri("https://models.inference.ai.azure.com"),        azureKeyCredential    ).AsChatClient("gpt-4o");
    var response = await client.GetResponseAsync("Hello, how are you today?");
    _response = response.Message.Text ?? "No response";}
With that we can successfully call an LLM from Blazor, and handle the response.

In Summary#
Microsoft.Extensions.AI makes it fairly trivial to hook your Blazor up to an LLM.
From here you can go on to explore IChatClient’s streaming capabilities to stream the response as it comes back.
Struggling to figure out what to focus on with Blazor?
BlazorSharp - The .NET Web Developers community is here to help!
- Connect with your fellow .NET web developers
- Keep up to date with the latest .NET changes
- Exchange tips, tools and tactics