Add MVC to your ASP.NET 1.1 application using the dotnet command line
If you’re using Visual Studio Code or another text editor to work on your ASP.NET Core web app then you’ll want to know how to add (and start using) MVC/Web API.
Last time out we started with a minimal ASP.NET Core web app using this command.
dotnet new webThe web template doesn’t automatically set up MVC (there are other templates that do) but it’s easy enough to add this ourselves.
Currently the csproj file only has one package reference to Microsoft.AspNetCore.
If you want to start using MVC you’ll need to also reference Microsoft.AspNetCore.Mvc.
Here you have two choices. You can simply add the reference to csproj yourself, or use the dotnet command to do it for you.
dotnet add package Microsoft.AspNetCore.Mvc
This command pulls down the MVC package from NuGet and also adds the reference to your .csproj file.
<Project Sdk="Microsoft.NET.Sdk.Web"> <PropertyGroup> <TargetFramework>netcoreapp1.1</TargetFramework> </PropertyGroup> <ItemGroup> <Folder Include="wwwroot\" /> </ItemGroup> <ItemGroup> <PackageReference Include="Microsoft.AspNetCore" Version="1.1.1" /> <PackageReference Include="Microsoft.AspNetCore.Mvc" Version="1.1.2" /> </ItemGroup></Project>From here you can start using MVC/Web API in your app.
Changes to Startup.cs#
Before you can start using MVC in your app you’ll need to make a couple of changes to startup.cs.
using Microsoft.AspNetCore.Builder;using Microsoft.AspNetCore.Hosting;using Microsoft.AspNetCore.Http;using Microsoft.Extensions.DependencyInjection;using Microsoft.Extensions.Logging;
namespace CoreAppEmpty{    public class Startup    {        // This method gets called by the runtime. Use this method to add services to the container.        // For more information on how to configure your application, visit https://go.microsoft.com/fwlink/?LinkID=398940        public void ConfigureServices(IServiceCollection services)        {            services.AddMvc();        }
        // This method gets called by the runtime. Use this method to configure the HTTP request pipeline.        public void Configure(IApplicationBuilder app, IHostingEnvironment env, ILoggerFactory loggerFactory)        {            app.UseMvc();
            // ...        }    }}
There are two important steps here.
.NET Core automatically uses Microsoft’s latest framework for dependency injection (hence the Microsoft.Extensions.DependencyInjection dependency). This provides a simple mechanism to register the services which your application needs.
Inside of the ConfigureServices method you can register any services (dependencies) that your application requires. In this case you’re registering all the services needed in order to use Microsoft’s implementation of MVC.
app.UseMvc() tells your app to add MVC to the request execution pipeline. This will ensure that all requests to your web application are routable to the MVC framework, meaning you can use controllers, views and anything else contained within the MVC implementation (action filters etc).
Taking it for a spin#
With ASP.NET MVC most of your web requests are going to be routed to controllers.
These controllers than take on the task of invoking your business logic and returning some kind of result and data.
Let’s start with a really simple controller.
Create a controllers folder in the root of your web app and then add a new file called HomeController.cs to it with the following code.
using Microsoft.AspNetCore.Mvc;
public class HomeController : Controller{    [Route("home/")]    public IActionResult Index(){        return Ok("Hello World from a controller");    }
}
This is just about the simplest controller you can get away with.
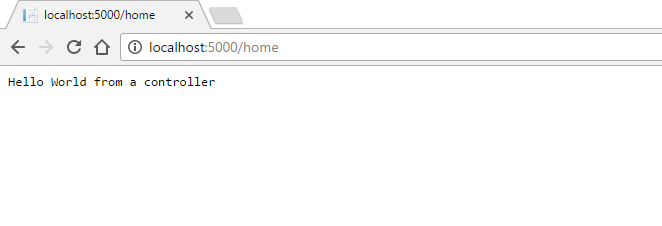
The Index action simply returns an HTTP 200 (OK) result with the string hello world message.
You need to tell Core what URL will bring users to this controller action.
You can configure routing for an ASP.NET Core application in the Startup.cs file or via attributes. To keep it simple for now we’ve used an attribute to indicate that any requests for “/home” should go to this controller’s action.
Test this out for yourself by compiling your app then viewing it in the browser.
dotnet run

In Summary#
Adding MVC to an existing ASP.NET Core app needs a reference to the MVC nuget package and then you can start creating controllers and building up your app.
Next up we’ll take a look at returning Views.
All posts in ASP.NET Core from scratch using the command line (csproj edition)
Struggling to figure out what to focus on with Blazor?
BlazorSharp - The .NET Web Developers community is here to help!
- Connect with your fellow .NET web developers
- Keep up to date with the latest .NET changes
- Exchange tips, tools and tactics