'Azure Bites: Get your site hosted on Azure for free in 15 minutes or less'
Did you know you can host your web sites for free on Azure?
If you want to see what Azure’s all about or deploy your site for development/testing then you can host up to 10 Web Apps in Azure for free.
Some caveats apply, you only get 1GB of storage and limited cpu time per day as it’s not intended for production purposes. But it’s great for testing as you develop your web app.
What you’ll need
We’re going to use Visual Studio to upload an existing app so you’ll need
- Visual Studio (you can always download the free community edition)
- A web app (you can just create a new empty web app in Visual Studio if you don’t already have one)
- A Microsoft Account (to log in to Azure)
If you don’t have an Azure subscription
If you haven’t already, go to the https://azure.microsoft.com and click the Try for free button.
You’ll get one month free as well as credit so you can try lots of Azure’s features without paying anything.
If you already have a subscription
If you already have an Azure subscription fear not, you can still host up to 10 web sites for free so read on to find out how.
Get your site on Azure
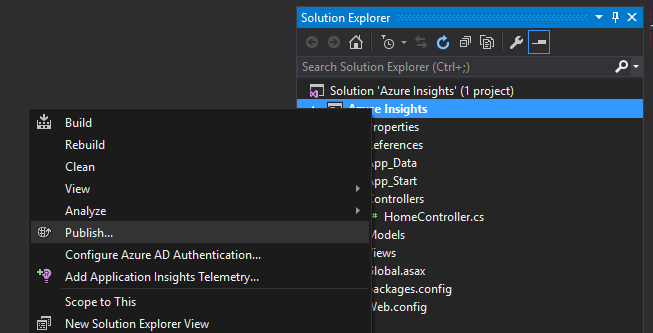
In Visual Studio, open your app, right click on your web application in Solution Explorer and click Publish.
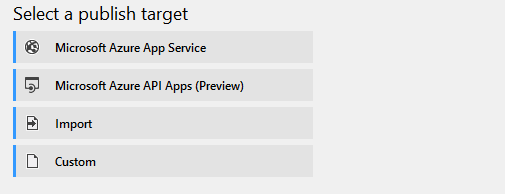
You’ll be be prompted to select a publish target, choose Microsoft Azure App Service
If you haven’t already, you’ll need to add your Microsoft account to Visual Studio in order to deploy your web app to Azure. Click **Add an account **and follow the instructions.

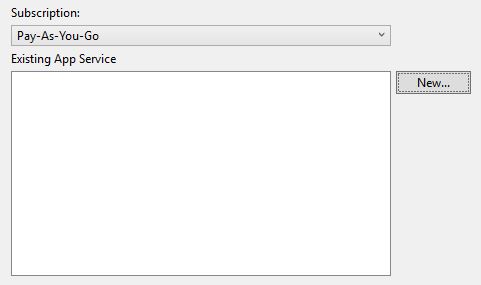
Once you’ve added your account you’ll see a list of any existing apps you’ve already created in Azure. Click New as we’re deploying our application for the first time.
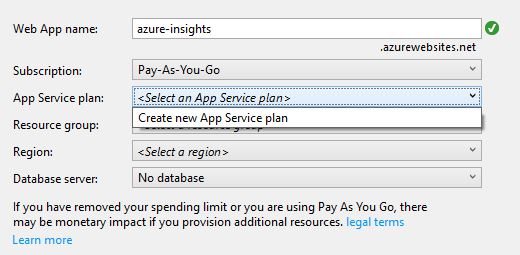
So now you need to choose a name for your web app. This name will be used to set the .azurewebsites.net address for your site so you’ll need to choose something which hasn’t already been taken.
Once you get a green tick next to the name then you know you’ve found a name no-one else has!
Service Plans
You’ll need to create a new App Service plan.
App Service Plans let you group your resources into different pricing tiers. Currently there are five tiers Free, Shared, Basic, Standard and **Premium. **The costs increase as you scale your web apps up through these tiers.
When you create your App Service plan via Visual Studio it will be the Free pricing tier. In the future you can add more resources to this tier by simply selecting it from the list.
For now, click Create new App Service plan and when prompted, enter a name.
Resource Groups
You will also need to select or create a new Resource Group.
Resource Groups are useful for managing related resources in one place (instead of having to hunt them down individually). For example, if your web app also has a database then you could put them both in the same Resource Group so you can view them together in the portal.
You’ll probably find you have a Default Group, select that or create a new one and enter a name.
Regions
Microsoft has several data centres around the world and these are identified as Azure Regions.
It generally makes sense to choose the region closest to you when deploying an app for your own test purposes. Select the best option from the list.
We’ll skip setting up a database for this example so when you’re happy with your choices click Create.
Take a well earned break
You’re almost there! Your work is done and now Azure is creating your web app. This can take a short while so wait for the progress bar to complete.
Once it’s done you’ll be shown your publish settings.
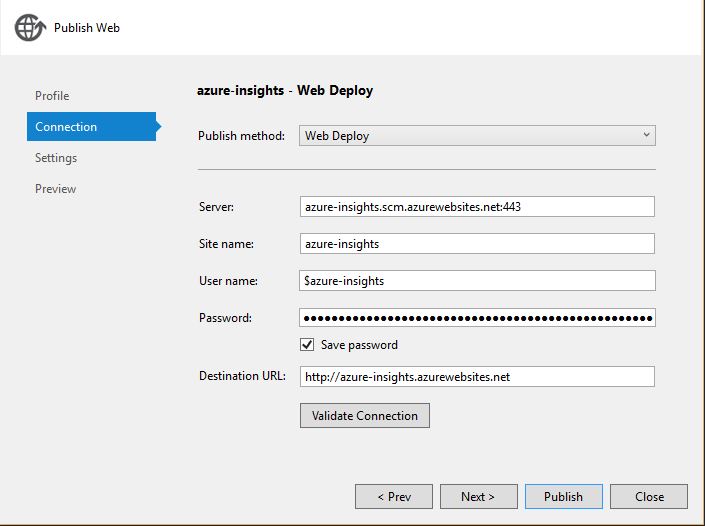
All that’s left is to click **Publish **and your site will be deployed to Azure.
You can keep an eye on it’s progress in the Output window in Visual Studio. Once it’s deployed your web app will open.

You did say this was free right?
If you’re anything like me you will probably want to check that your new web app is hosted on the free pricing tier and isn’t going to land you with a hefty bill at the end of the month.
You can do this via the portal.
Log in and you’ll see all your resources.
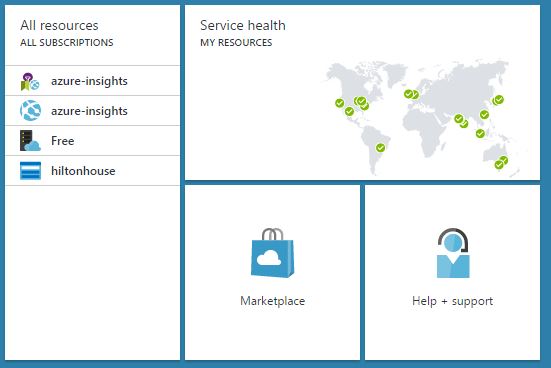
Select your new web app (the blue globe icon).
On the blade which opens up, in the essentials section at the top, you’ll notice it lists your App Tier. Click on the blue name of the tier to see it’s details.

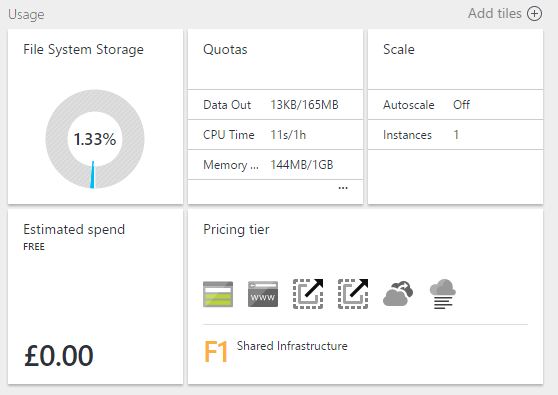
Here you’ll see the pricing tier in the usage section confirming that your app is on the free plan (F1).
And relax
So there you have it, your site’s up and running, not costing anything and you can get back to developing something!
Struggling to figure out what to focus on with Blazor?
BlazorSharp - The .NET Web Developers community is here to help!
- Connect with your fellow .NET web developers
- Keep up to date with the latest .NET changes
- Exchange tips, tools and tactics