'Azure Bites: API App'
Not got much time but want to learn Azure? Azure Bites takes you through key Azure concepts in Pomodoro sized bites.
So what’s an API App? Well it’s exactly what you think, a way of hosting an API written in your language of choice which can be scaled, secured and documented.
Let’s get started by creating a brand new API via the Azure Preview Portal.
Start > New API
As with our previous post on Web Apps it all begins with a click of the + New button in the Azure Preview Portal.
You’ll find API Apps under Web + Mobile.
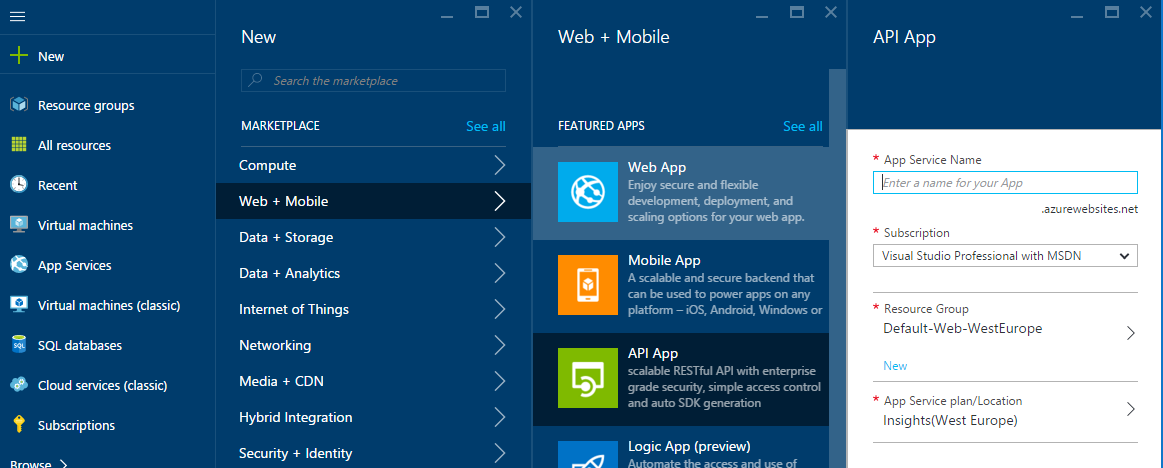
Now you’ll need to put your thinking cap on and decide what you’re API is to be called, this will also generate a new .azurewebsites.net address. As with Web Apps, this will have to be unique so if anyone else in the world has nabbed your name you’ll have to come up with a new one.
You’ll need to choose a Resource Group, click New if you want to create a new one. Resource Groups warrant their own post but for now just think of them as a way to organise everything which you create on Azure into manageable groups.
You’ll also need to choose a Service Plan/Location (again, something we’ll cover in depth in another post).
Once you’re happy, click Create and wait for Azure to get your API up and running.
Whilst here it’s worth noting the Pin to dashboard option. Leave this ticked and you’ll get a tile on the Azure portal dashboard for quick access to this API app in future. Right now it will show that your App is being created.
Hello World
Once your app is up and running it’s time to deploy your code.
If you already have an API raring and ready to go, now might be a good time to set up continuous deployment.
But what if you don’t have an API, read on to see how we can create one directly from the Azure Portal.
Build your API (the cheaty way)
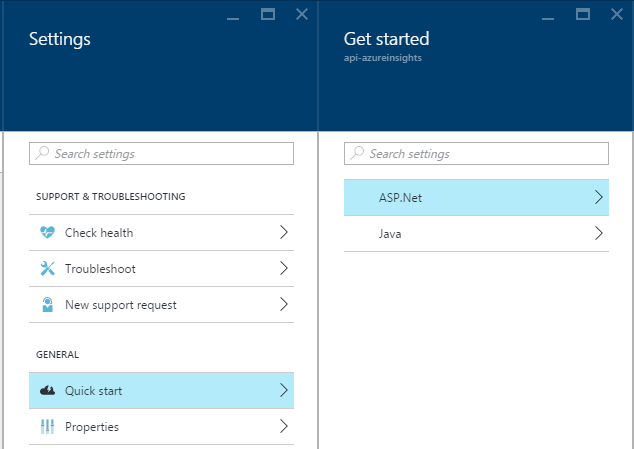
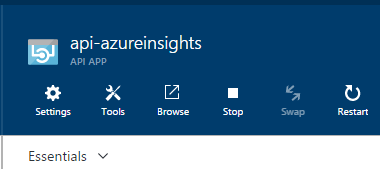
Go to your API App (either via the tile on the dashboard or App Services on the main menu).
In the Settings panel look for Quick Start. Here you can choose which language to use, let’s go ASP.NET for now.
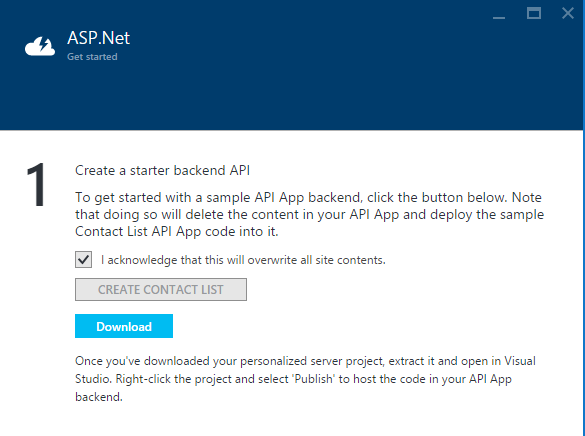
You can now choose to install Azure’s starter backend API (a contact list API). You’ll need to confirm you’re happy for your site’s contents to be overwritten then click **CREATE CONTACT LIST **and wait whilst your API is created for you.
You can also download the contact list app and open it in Visual Studio (you can use the community edition which is free).
A new API is born
Once your API has been deployed (check via the Notifications button, top right of the portal), you can hit your site in the browser using the address you chose earlier.
Alternatively just use the **Browse **button on the main panel for your API app in the portal.
What you’ll see is an error. You do not have permission to view this directory or page.
By default the sample app is secured. However, this need not stop us checking everything is up and running.
If you add** /swagger/docs/v1** to the end of your API url you should get documentation back about the API as JSON data.
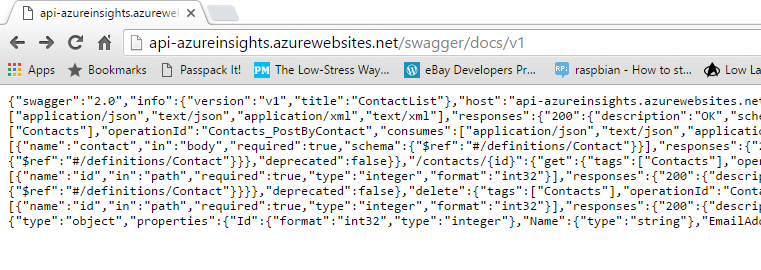
Swagger is a representation of your API, it allows users to interact with your API, test it out and generate code to interact with your API. The ContactList sample app uses a NuGet package called Swashbuckle to provide Swagger metadata for the API.
This JSON is all well and good, but we can do better. Step in the Swagger UI.
Visit your API site in the browser and add /swagger to the url.

From here you can test each of the operations and see details such as what response codes will be returned by the sample API.
Connecting an application to your API
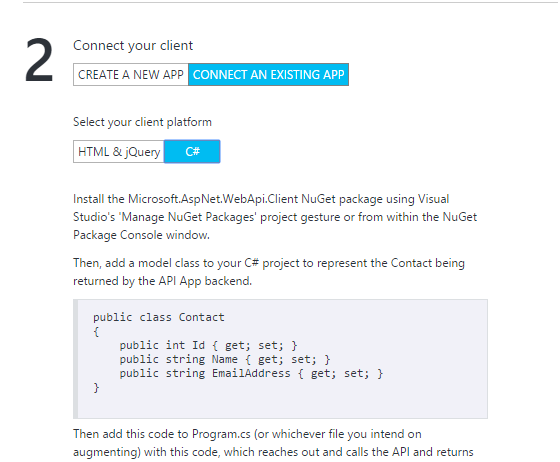
So you have an API and you can test it out in the browser. Next you’ll probably want to connect a real application to it.
We’ll cover this including authentication when we build a basic sample app for the Contacts API in another post but if you want to use your API in the meantime take a look at the examples in the **QuickStart **panel we saw earlier.
Your skills aren't becoming obsolete. They're becoming essential.
Practical engineering principles for building software that works - with or without AI.