Create a minimal ASP.NET Core 1.1 web application using the command line
March 23, 2017 · 5 minute read
You want to build a .NET Core web application and keep it to the bare minimum files and dependencies to start with.
We all remember the “Basic” vs “Empty” MVC templates from Visual Studio’s recent past. Do you want your app empty, or really empty?!
Happily you can go minimal using .NET Core and start with nothing more than a wwwroot folder, a couple of .cs files and a .csproj file.
Hello World
Make sure you have the latest SDK installed.
Then open up a command prompt, find the place you want to create your web apps and type the following.
mkdir Coreapp
cd CoreApp
dotnet new web
You can use another template if you’d prefer.
If you type dotnet new without a template name you’ll see the list of templates you can use.
dotnet new
There are templates for MVC, Web API and a few others.
Using web keeps the app minimal and you can add in the bits you want as you go. But you might want to check out the other options, if only to see how Microsoft tackle setting various parts of MVC/Web API up.
Take a look at your new web app and you’ll see there’s hardly anything to it.
The wwwroot folder is where any non-compiled content goes by default. This is where you’d put html, js files which can then be served straight to the browser.
To test your web app, you’ll need to restore any dependencies, then run it.
dotnet restore
dotnet run
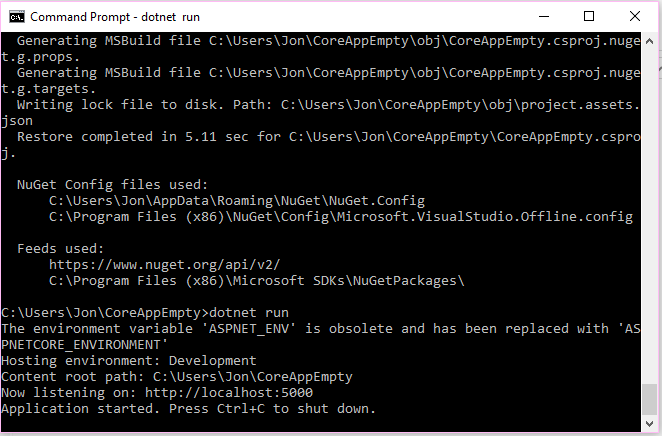
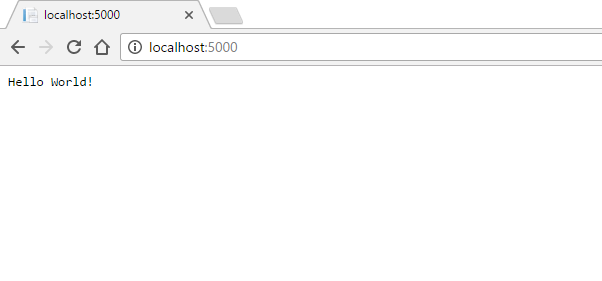
Hit the browser and you’ll see the result of your efforts so far!
Under the hood
So how is all this working?
When you create a .NET Core app, you’re essentially creating a console app.
You can run the app (using dotnet run) on Windows, Linux or Mac.
When you created your app, two .cs files were automatically created for you.
Startup.cs
startup.cs tells .NET Core what to do when you run your app.
public void Configure(IApplicationBuilder app, IHostingEnvironment env, ILoggerFactory loggerFactory)
{
    loggerFactory.AddConsole();

    if (env.IsDevelopment())
    {
        app.UseDeveloperExceptionPage();
    }

    app.Run(async (context) =>
    {
        await context.Response.WriteAsync("Hello World!");
    });
}
In this case it sets up some logging so you can see log output (info, warnings, errors etc.) in the console.
Then it configures the app to serve the developer exception page in the event of any problems. This will only be shown if the app is run in development mode (typically on a developer’s machine, with the app switching to production mode when deployed to a live environment).
Finally, we need to decide what should actually happen when the app is run which is where the app.Run code kicks in.
In this case it simply writes “Hello World!” straight to the web response stream.
Program.cs
Program.cs is where you configure your app’s dependencies and middleware.
public class Program
{
    public static void Main(string[] args)
    {
        var host = new WebHostBuilder()
            .UseKestrel()
            .UseContentRoot(Directory.GetCurrentDirectory())
            .UseIISIntegration()
            .UseStartup<Startup>()
            .Build();

        host.Run();
    }
}
Middleware refers to the various “things” that are being configured here such as using Kestrel.
They are the building blocks of your web app and are run as part of the pipeline of your application.
Middleware is useful for things like authentication where you want every request for secure content to go through an authentication stage before the actual content is served.
In this case the app is configured to use Kestrel which is a lightning fast cross-platform web server.
The ContentRoot will become important when we move on to serving MVC views and other content from our app. Here it’s simply set to the current (root) directory for our application.
UseIISIntegration means you can host your .NET Core app via IIS. The difference between this and the Full .NET Framework is that IIS is not configured as the server for your .NET Core app but rather acts as a reverse proxy. Basically it sits in front of Kestrel to handle incoming requests from the web, then forwards these requests on to Kestrel and returns the response from Kestrel.
Finally we just need to indicate what class to run on startup (Startup in this case).
.csproj
If you’ve been using .NET Core before the latest tooling was released than you might have got used to project.json for configuring your app’s dependencies and runtime version.
Microsoft has deprecated project.json and adopted a leaner version of the .csproj file instead.
<Project Sdk="Microsoft.NET.Sdk.Web">

  <PropertyGroup>
    <TargetFramework>netcoreapp1.1</TargetFramework>
  </PropertyGroup>

  <ItemGroup>
    <Folder Include="wwwroot\" />
  </ItemGroup>

  <ItemGroup>
    <PackageReference Include="Microsoft.AspNetCore" Version="1.1.1" />
  </ItemGroup>

</Project>
This is relatively simple (compared to some of the monster csproj files you may have seen before).
Worth noting that this app is targeting .NET Core 1.1 (you could target earlier versions such as 1.0 if you want/need to).
The Microsoft.AspNetCore package brings in the various .NET Core dependencies that you’ll need to get started building ASP.NET Core apps which are then downloaded when you run dotnet restore.
In Summary
So that’s about as empty as your web app can be and still do something useful.
Next up we’ll look at setting up MVC and Web API.
photo credit: Giuseppe Milo (www.pixael.com) Moving stones in Racetrack – Death Valley, United States – Travel photography via photopin (license)
All posts in the
ASP.NET Core from scratch using the command line (csproj edition) series.